
 Motomaxsfr
Search Product
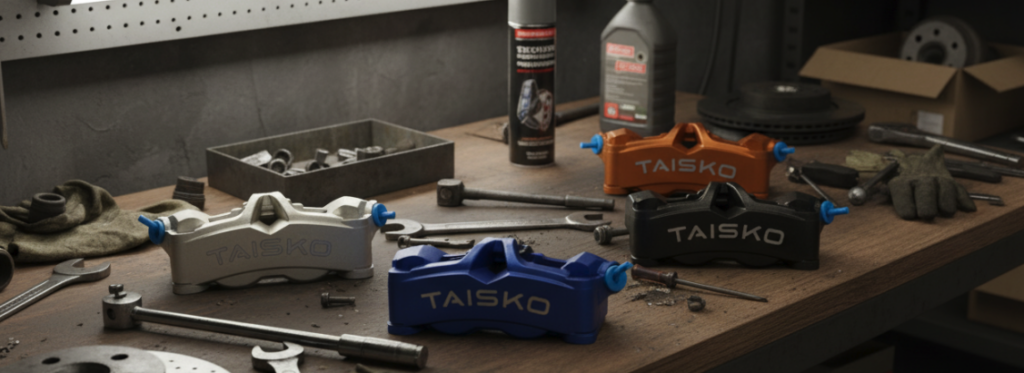
How To Service Motorcycle Brake Calipers
Many novices want to maintain the brake calipers by themselves. This is indeed a good opportunity to save money and learn more about your car. The brake system can’t tolerate the slightest sloppiness. If you want your calipers to return to peak condition, follow the following steps.
Step 1. Preparatory Work And Initial Disassembly
Preparation is the basis for success or failure. Before doing it, make sure that the motorcycle is firmly mounted on the lifting frame or large brace.
Loosen the hardware first: This is a professional skill-when the caliper is still firmly fixed on the front fork, first use this fulcrum to loosen the caliper fixing bolts and brake pad guide pins. These pins tend to “bite” to death due to long-term thermal cycling. If you remove the caliper and hold it in your hand before you want to exert your power, it will definitely make you crazy.
Safety first: Make sure the vehicle has completely cooled. The brake parts will accumulate amazing heat after riding, so don’t rush to get started.
Step 2. Deep Cleaning Of Piston And Caliper Body
When you remove the calipers from the front fork and remove the brake pads, you will see black brake dust and road sludge piled up around the piston.
Select the right chemical: a special brake cleaner that does not contain chlorine must be used. Those inferior or corrosive cleaners will directly cause the rubber seal to degrade or even fail.
Cleaning process: Find a soft nylon brush and carefully scrub the exposed part of the piston. Before pushing the piston back into the caliper housing, the dirt must be brushed clean. If you are lazy and push back directly, dirt will be brought into the oil seal, causing oil leakage in the slightest and piston “stuck”.
Step 3. Key Inspection Of Sealing Ring And Guide Pin
This step of visual inspection can help you avoid many catastrophic brake failures. While the calipers are now clean, carefully observe the rubber dust seal around the piston.
Check for completeness: Look for cracks, oil leakage, or abnormal bulges. As long as the sealing ring is found to be damaged, don’t hesitate to do a full set of calipers directly.
The importance of guide pins: For floating calipers, the guide pins are the core of the automatic centering of the caliper. Make sure these pins slide freely. If they are rusty or astringent, your brakes will drag, causing abnormal wear of the brake pads and generating excessive heat.
Step 4. Correct Lubrication
Lubrication is an area where many beginners are prone to making mistakes.
Use high-temperature silicone grease: Apply a thin coat on the guide pins. Silicone grease is compatible with rubber parts and can withstand high temperatures during braking.
Taboo: Never use petroleum-based greases or ordinary general-purpose butter. These petroleum products will cause the rubber dust cover and sealing ring to rapidly swell and decompose, and finally directly cause the brake system to lock up.
Step 5. Piston Reset And Reinstallation
When all components are cleaned and lubricated, assembly can begin.
Piston return: Use a professional piston pressure back tool, or a large G-clip, and slowly press the piston back to the housing. In order to make room for the installation of new brake pads.
Thickness check: Before plug back into the film, finally confirm the thickness of the friction material (usually at least 1.5mm to 2mm).
Tighten according to the standard torque: Put the caliper back to the front fork. A torque wrench must be used in strict accordance with the torque value specified by the manufacturer. If you twist too loosely, you are joking with your life. If you twist too tightly, you may directly break the thread on the front fork foot, and then you will have no time to cry.
Step 6. Exhaust Air To Ensure The Best Performance
Finally, the most critical step is to refresh the entire hydraulic system.
Oil selection: Use the new brake oil that has just been opened. The model must see clearly the requirements on the master cylinder cover.
Eliminate the “sponge feeling”: exhaust air is to completely remove the air bubbles in the pipeline. Air can be compressed, but brake fluid cannot. Only by draining the air can we find the direct and solid feel.
System refresh: brake fluid has a strong water absorption. Regular replacement of oil can prevent the internal metal parts rust corrosion.
The Benefits Of Regular Maintenance Calipers
Following these steps, you are not only maintaining the vehicle, but also improving the safety factor. Regular maintenance of the calipers can prevent eccentric wear of the brake pads, eliminate unnecessary power loss, and retrieve the on-call braking force. Only when the feedback from the braking system is clear and stable can you be confident when riding on the road.
Author: Jack Miller
“Hi, With over 12 years of experience turning wrenches in the garage, I’ve seen firsthand how a well-maintained machine makes all the difference on the road. My passion is helping fellow riders transition from novices to confident DIYers. I’m dedicated to sharing professional maintenance techniques that prioritize safety and precision, ensuring every rider can enjoy a smooth, reliable, and high-performance journey.”
The prev: What Is Timing Chain In MotorcycleThe next: How To Count Motorcycle Chain Links
Related recommendations
-

Why Does Motorcycle Chain Get Loose
335Discover Why Your Chain Gets Loose. It’s Not “Stretch,” But Wear From Friction. Learn How Lubrication And Alignment Affect It.
View details -
Does A Smaller Sprocket Increase Speed
248Does A Smaller Sprocket Increase Speed? Learn How Front Vs. Rear Gearing Affects Your Top Speed And Acceleration.
View details -
How To Size A Motorcycle Chain
57Learn How To Measure And Cut Your Motorcycle Chain Safely With The Side-By-Side Pin Method. Measure Twice, Cut Once!
View details -
Do You Have To Lube Chain After Washing Motorcycle
54Prevent Motorcycle Chain Rust And Wear. Learn Why Oiling After Washing Is Vital For A Smooth, Long-Lasting Drivetrain.
View details


